Sunday, August 28, 2011

There's carpet in the Master bathroom!!!! Part 2

After finishing the floor, vanity, and back splash it was time to begin the shower and tub tile.  We waited a few months between these two projects.  Here is the before picture of the shower/tub area:


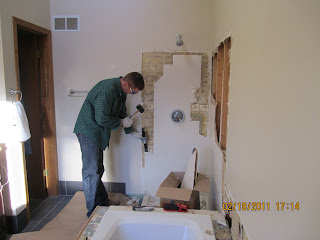
The fist step in this project was demoing the original tile, shower glass, and shower base.  Everything came out real easily, however I was really careful not to hit any pipes.  Here are some demo photos:


 After demo was complete I installed a new sheet o plywood over the OSB board.  Next I installed a new floor drain and 2x8s between the studs to create a place to staple the shower liner to.  I was able to add an additional 4SF of space onto the shower by extending the base to come flush with the tub frame.  To keep water from exiting the shower I also built a curb out of 2x4s. Here are some pics:


During this time I also hired a plumber to install a new shower valve and extend the shower head outlet to accommodate a rain shower head.  The plumber had the valve and copper pipe installed in about an hour at a  cost of $110.  I pretty much watched over his shoulder to learn as much as I could; so maybe next time I can do it myself.  The next step was to install the shower liner.  After the liner was stapled to the 2x8s I began installing 1/2" cement board on the walls.

After all the cement board was installed I placed fiber tape on every joint then applied mortar over the taped joints.  I also placed about 1 inch of base mortar on top of the shower liner.  After waiting 24hrs for the mortar to cure, I installed a layer of mesh wire and then finally placed another 1 inch of base mortar on top of the mesh.  This mesh provided extra compressive strength to the base. 

Before I could start laying tile, I built 12" x 12" niche in the wall for shampoo/soap storage.  The niche fit perfectly between the existing studs.


Tile:  I wanted to match the shower base tile with the floor tile so I chose a charcoal color.  I love the look of travertine so I stuck with soft tan and beige colors for the wall and tub surround.  I really like the the base pops against the lighter wall tile.  I bought all our shower/tub tile from Floor and Decor outlet and Lowes.  Shower wall tile was 6"x12" travertine, base 2"x2" porcelain, 4" travertine mosaic boarder,  and the tub 1"x2" travertine.   Unfortunately I do not have many pictures of the tile install:


(tom loves cool tile)
After completing the tile, I installed the shower head and valve hardware.  We went with a combination from Delta faucet.  We also installed a new brushed nickel tub faucet from Home Depot to match the vanity faucets.
The last step in the renovation was the shower glass.  After searching around and negotiating with various glass installers we ended up with 1/2" seamless glass.   To match everything else in the bathroom we chose brushed nickel hardware and a matching ladder handle.  I think in the end the bathroom turned out great.  I want to thank Kim for being patient with me and showering in the guest bath for weeks!!  Here are the final results:  


Thanks for reading!!


Wednesday, August 24, 2011

There's carpet in the Master bathroom!!!! Part 1

The biggest project we have completed to date is the master bathroom.  This room was most in need of an update because everything in the room was about 20 years old and the flooring was carpet.  All the fixtures had chrome finishes and the vanity had a laminate counter top that was starting to peel apart.  The one thing we loved about the master bath was the size.  The original layout worked so we didn't need to do any major demolition or utility relocation.  Our must haves for the renovated bathroom were:
-Heated Tile floor
-tiled shower base
-Double Vanity
-seamless glass shower
-rain shower head
-enclose entry way (future post)

Here are some before pictures:


Now for the renovation pics:

First step removing the old mirror, old vanity, carpet, and linoleum in the lav area:


After demo, I started by screwing down the original OSB board.  Then I set the cement board in a layer of mortar.  Before the mortar began to set, I screwed the cement board to the OSB base.  After the cement board was installed I troweled on another layer of mortar on top of the cement board.  Next the radiant floor heating was installed.  I utilized a 3'x10' roll of Heated underlayment from Home Depot (http://heatedunderlayment.com/index.html).  This was honestly way easier to install then I ever thought it would be.  The underlayment simply unrolled and fit perfectly from the shower to the beginning of the vanity.  After the heating was placed on the mortar bed, tile was ready to be installed.  Unfortunately I do not have any pictures of the heated underlayment.

 I chose 8" x 24" porcelain tile from Florida Tile (http://homeowners.floridatile.com/products/urbanite).   This was the first floor tile I have ever installed so it took me longer than I imagined.  I constantly had to check my installation with a 3' level.  Tile spacers were also a huge help:  Here are some pictures of the installed tile:


After the tile was installed I wired the heated flooring to an existing receptacle.  I also had to install a thermostat to regulate the heated flooring.  I simply fished the wire from the now blanked out receptacle to the thermostat.  The wires from the underlayment were also fished to the thermostat.  Then a quick square cut into the drywall, a little mud, and a few wire nuts and the job was finished. 

Vanity:  Kim and I decided to go with a double vanity.  To save cost we purchased a travertine double bowl vanity from Overstock.com.  It was considerably less then most of the vanities sold at bath or big box stores.  The only problem was that it weighed over 450 pounds. Needless to say it took 4 people to transport it from the garage to the bathroom.  Here is a picture of the vanity:

After the vanity was installed I went on to install a travertine backsplash.  The backsplash was meant to match the vanity top.  I chose a 2x2 mosaic from Florida Tile.  This was by far the easiest tile to install.  I troweled on a simple tile adhesive and pressed the 12"x12" pieces on the wall.  The only thing I had to look out for was keeping the tiles straight both vertically and horizontally.  After Installing the backsplash I purchased and installed two brush nickel mirrors and two brushed nickel faucets from Home Depot.  The original plumbing did not have any shut off valves at the vanity so I went ahead and installed 4 compression fittings.  The installation of the faucets was a learning experience.  I won't lie I probably spent 20 hours installing them.  I basically replaced all of the plumbing from the wall out.  After all the installations here is the finished product:

My next post will include the shower and bath renovations.  Thanks for reading!


Wednesday, August 17, 2011

Why not paint the Oak trim white!

From the first time I set foot into our house I knew it would look much better with white trim instead of the 90's golden oak originally installed in the house.  Here are a few pics of the original oak trim:

Bay window

Chair rail:
My wife was really against painting the oak.  It took me about 6 months of bugging her with pictures of how nice white trim looks.  I would email her pictures of beautiful homes with modern white trim.  We also went to the Columbus parade of homes in June.  Most of these custom new homes had white trim.  When I first started seriously researching the best way to start the transformation I looked at pictures from blogs.  I had trouble finding many posts focusing on changing oak to white.  That's one reason I figured I would document my renovation.  The first room I started painting was the living room.  Originally this room had 3" tall oakbase.  I always liked the look of taller trim so I ripped the original out and went with 4-1/4" primed pine trim from Home Depot.  It ran about $2 a linear foot.  This primed trim only needed one coat of white paint before installation.  The process I ended up utilizing was a combination of instructions I found on the internet:

Step 1: Wash existing trim with wet rag. 
2: Tape areas that need protected.
3: Lighly sand with 150 grit paper just to scuff the trim.
4: Wipe sanded trim with wet rag again. (I used a shop vac to clean up areas where excess dust appeared)
5: Apply 1 coat of white primer/sealer.
6: Caulk any areas that have imperfections or nail holes.
7: Apply 2 to 3 coats of white paint.

Here are some pictures of the living room and eat in kitchen area before:


dining room before:


after pictures: